Setting up your Maven project for continuous delivery with Buildkite and packagecloud allows you to:
-
Map every commit to a published artifact, and vice versa.
-
Reduce the risk of a “bad deploy” by having a centralised, automated and repeatable process that’s versioned, and tested, alongside your code.
-
Drastically shorten the feedback loop between making a change, and verifying its behavior in another context (a staging environment, another developer’s machine, etc).
Using a managed Maven repository, like packagecloud, alongside Buildkite gives your team:
-
A tailored web interface built for browsing artifacts, along with automatically generated installation instructions for Maven, SBT, Gradle and Leiningen.
-
Flexible authentication/permissions system, giving every team member their own set of credentials which can be revoked individually. No need to share secrets!
In this post I’ll show you how to setup your Maven project with Buildkite and packagecloud. Download the example Maven project from GitHub to follow along on your own machine: https://github.com/computology/buildkite-maven-project.
Create a Maven repository on packagecloud.io
Before we begin we’ll need to create our Maven repository on packagecloud and get our API token. This will allow us to deploy our artifacts from our Buildkite agent machine. Sign up with this link to get a free Maven repository.
Once you have an account on packagecloud, you can visit your API Token page to get your API token, which you’ll need in the next step.
Setup a Buildkite Agent server
For our example, we’ll be using installing Buildkite on an Ubuntu 16.04 system using the Installing Buildkite Agent on Ubuntu documentation.
Step 1 : Update system packages and install Maven
As one does with any new server we upgrade our system packages to the latest versions, and then install Maven:
sudo apt-get update && apt-get upgrade -y

sudo apt-get install -y maven openjdk-8-jdk
Step 2: Install Buildkite agent
Using the instructions from the Installing Buildkite Agent on Ubuntu documentation, let’s install the Buildkite Agent:
sudo sh -c 'echo deb https://apt.buildkite.com/buildkite-agent stable main > /etc/apt/sources.list.d/buildkite-agent.list'

sudo apt-key adv --keyserver hkp://keyserver.ubuntu.com:80 --recv-keys 32A37959C2FA5C3C99EFBC32A79206696452D198

sudo apt-get update && sudo apt-get install -y buildkite-agent
Step 3: Configure and start the Buildkite agent
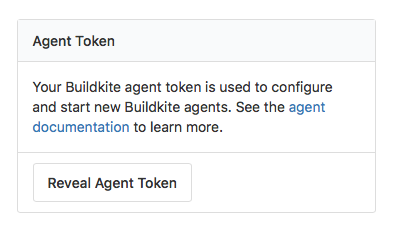
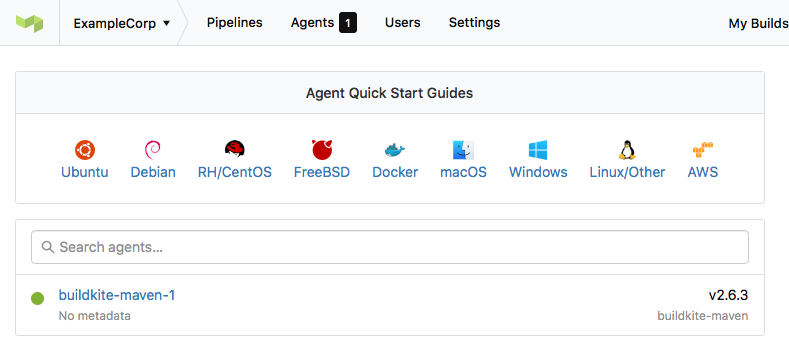
Once installed, we’ll need to to set the agent token. You can retrieve this token on your Buildkite Agents page:
Then, we’ll configure our agent with that token, and then start your agent:
sudo sed -i "s/xxx/INSERT-YOUR-AGENT-TOKEN-HERE/g" /etc/buildkite-agent/buildkite-agent.cfg

sudo systemctl enable buildkite-agent && sudo systemctl start buildkite-agent
You should now see the agent connected on your Buildkite Agents page:
Step 4: Add packagecloud API token hook to our Buildkite Agent
We’ll expose our packagecloud API token through an environment variable using a global hook. Hooks are scripts that the Buildkite agent runs at different stages of a build. For more information, check out the full documentation on hooks.
To setup our global hook, paste the following into a file located at /etc/buildkite-agent/environment. Theenvironment hook is the first hook the Buildkite Agent runs and, as its title suggests, is the best place to setup your environment variables. Make sure this file is executable and owned by buildkite-agent.
#!/bin/bash

set -euo pipefail

echo '--- Setting up packagecloud API token'

export EXAMPLECORP_PACKAGECLOUD_API_TOKEN='xxxxxxxx'
You can secure this approach even further by using a credentials manager store and retrieve your secrets, like Vault. But for the sake of simplicity, we’ll just put our API token inside the hook.
Step 5: Generate an SSH key for our Buildkite Agent
In order to authenticate with GitHub to pull our project, we’ll need to generate an SSH key for the user running our Buildkite Agent (buildkite-agent by default), as per the Buildkite Agent SSH Keys documentation:
sudo su buildkite-agent

ssh-keygen -t rsa -b 4096 -C "ci@example.com"

cat ~/.ssh/id_rsa.pub

# Later you'll add this key to GitHub as a Deploy Key
Create a pipeline for our Java project
Step 1: Create a new pipeline on Buildkite
Our pipeline is straightforward, it just runs a single step:
mvn -s .buildkite.settings.xml deploy
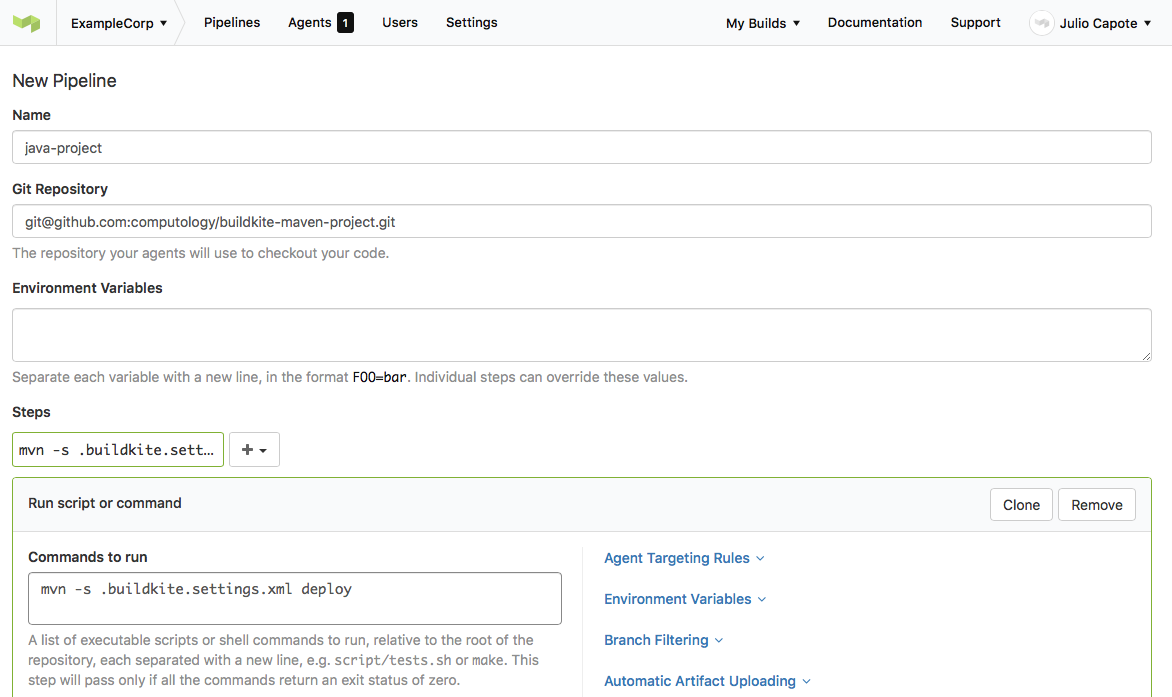
After the pipeline is created, you’ll be presented with instructions for setting up Webhooks on GitHub, so that Buildkite can automatically trigger builds every time code is pushed up to your repository. Copy/Paste the generated Payload URL, since we’ll need it for the section below.
Prepare Github repository for Buildkite
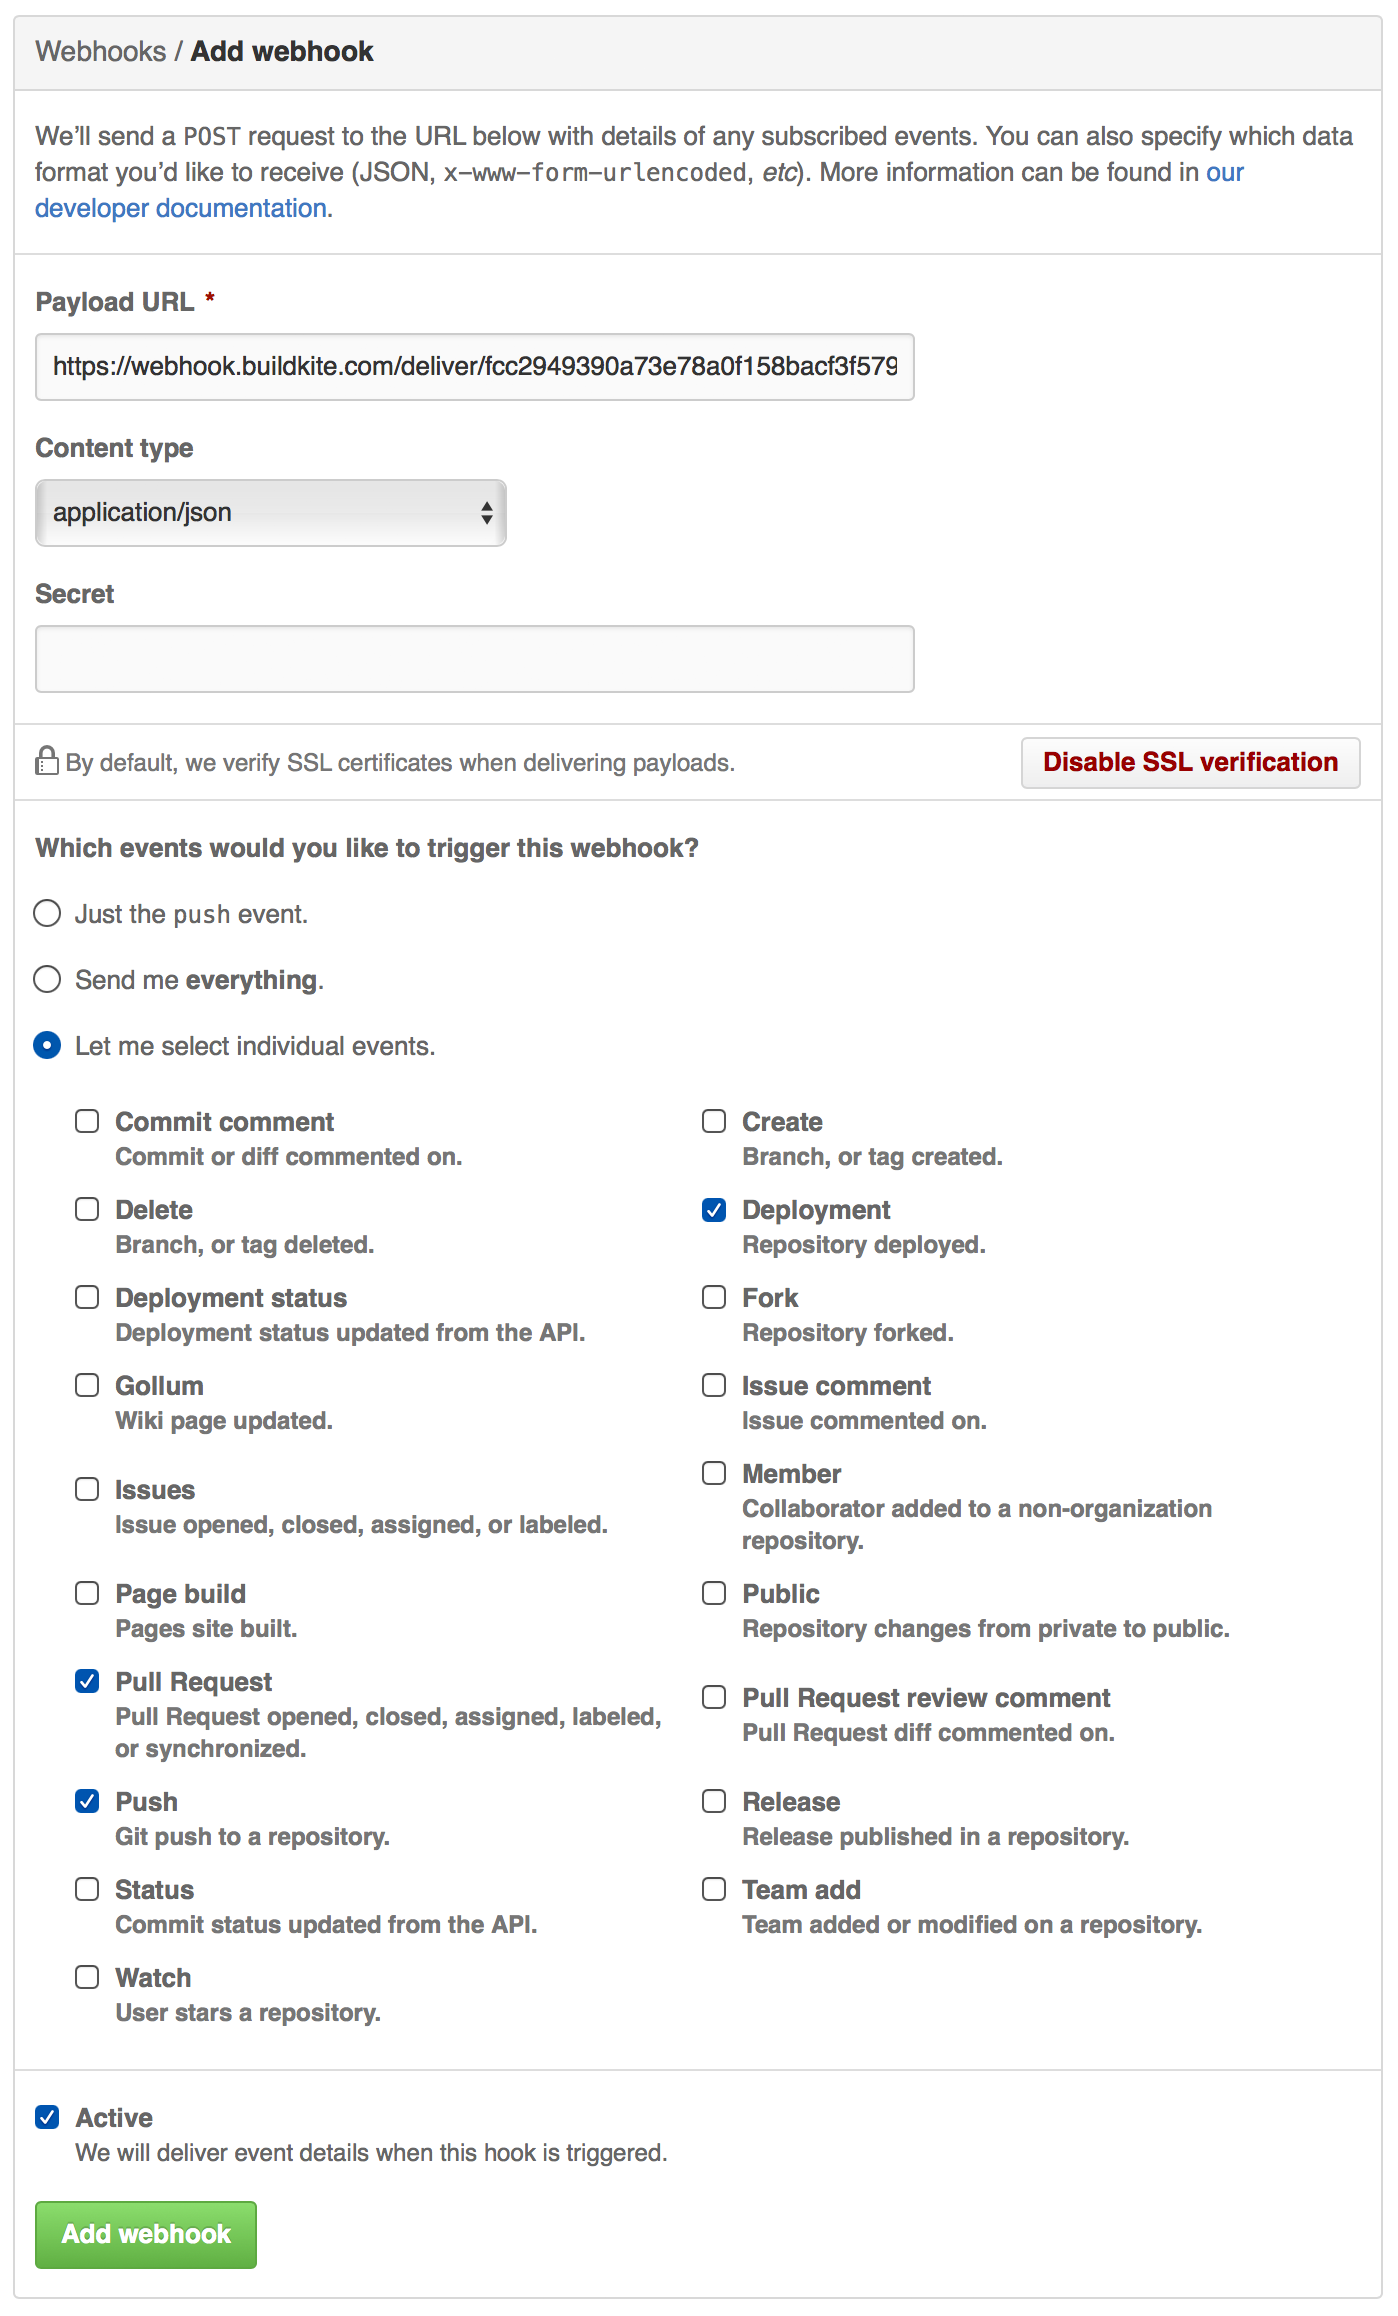
Step 1: Add webhook URL
As per the Buildkite instructions, go to the Webhooks section of your GitHub repository Settings page and add the Payload URL generated by Buildkite:
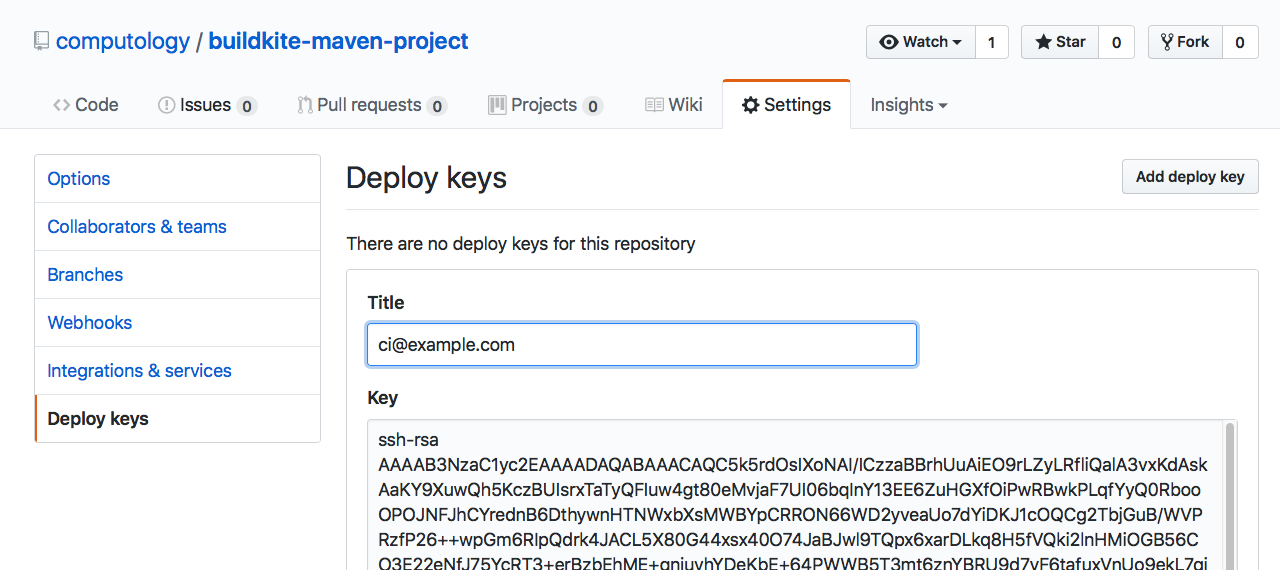
Step 2: Add the deploy key to the repository
Visit the Deploy Keys section of your GitHub repository Settings page and add the SSH key we generated earlier.
Prepare your Java project for continuous delivery
The pipeline is configured to export our packagecloud API token, and run on GitHub commits and pull requests. All that’s left is to configure Maven to use this environment variable, and publish to packagecloud.
Step 1: Add the .buildkite.settings.xml file
Copy the content below (GitHub source) into a .buildkite.settings.xml file in your project. This instructs Maven to use a password value from the environment variable EXAMPLECORP_PACKAGECLOUD_API_TOKEN, which we setup in our agent hook, for any distributionManagement repositories with an id of packagecloud-exampleCorp.
<settings xmlns="http://maven.apache.org/SETTINGS/1.0.0"
  xmlns:xsi="http://www.w3.org/2001/XMLSchema-instance"
  xsi:schemaLocation="http://maven.apache.org/SETTINGS/1.0.0
  http://maven.apache.org/xsd/settings-1.0.0.xsd">
  <servers>
    <server>
      <id>packagecloud-exampleCorp</id>
      <password>${env.EXAMPLECORP_PACKAGECLOUD_API_TOKEN}</password>
    </server>
  </servers>
</settings>
Step 2: Add the maven-packagecloud-wagon dependency
Add the following to your pom.xml file. This allows Maven to natively deploy artifacts to the packagecloud API.
<build>
  <extensions>
    <extension>
      <groupId>io.packagecloud.maven.wagon</groupId>
      <artifactId>maven-packagecloud-wagon</artifactId>
      <version>0.0.6</version>
    </extension>
  </extensions>
</build>
Note: This is only needed for uploading artifacts. Any Maven-compatible build tool can use this repository without a plugin.
Step 3: Add your packagecloud repository
Add the repository you created to the distributionManagement section of your pom.xml. The id that we set here has to match the id in our .buildkite.settings.xml file. In our case, we are using packagecloud-exampleCorp and pushing artifacts to the exampleCorp/main repository we created earlier in this post.
<distributionManagement>
  <repository>
    <id>packagecloud-exampleCorp</id>
    <url>packagecloud+https://packagecloud.io/exampleCorp/main</url>
  </repository>
  <snapshotRepository>
    <id>packagecloud-exampleCorp</id>
    <url>packagecloud+https://packagecloud.io/exampleCorp/main</url>
  </snapshotRepository>
</distributionManagement>
Step 4: Push some code!
When we push new code to our project, or create a pull request, it will trigger our Buildkite Agent to pull the code and run the step we’ve defined in our pipeline.
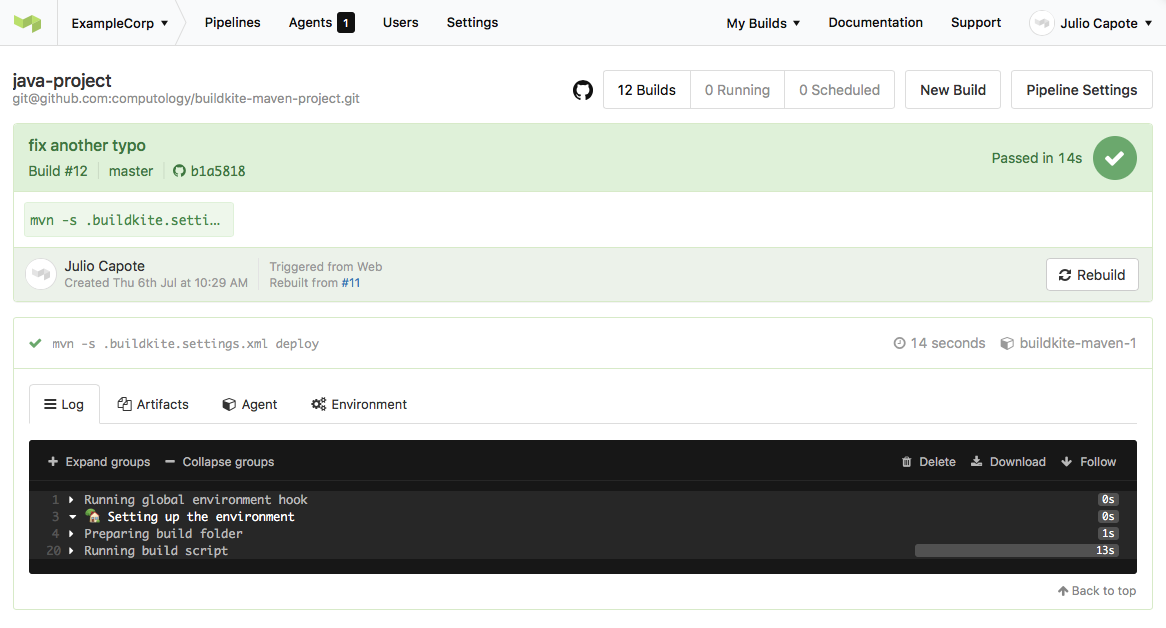 Successful build!
You can also browse the packagecloud repository (see our public exampleCorp/main repository) and see the generated artifact along with its install instructions.
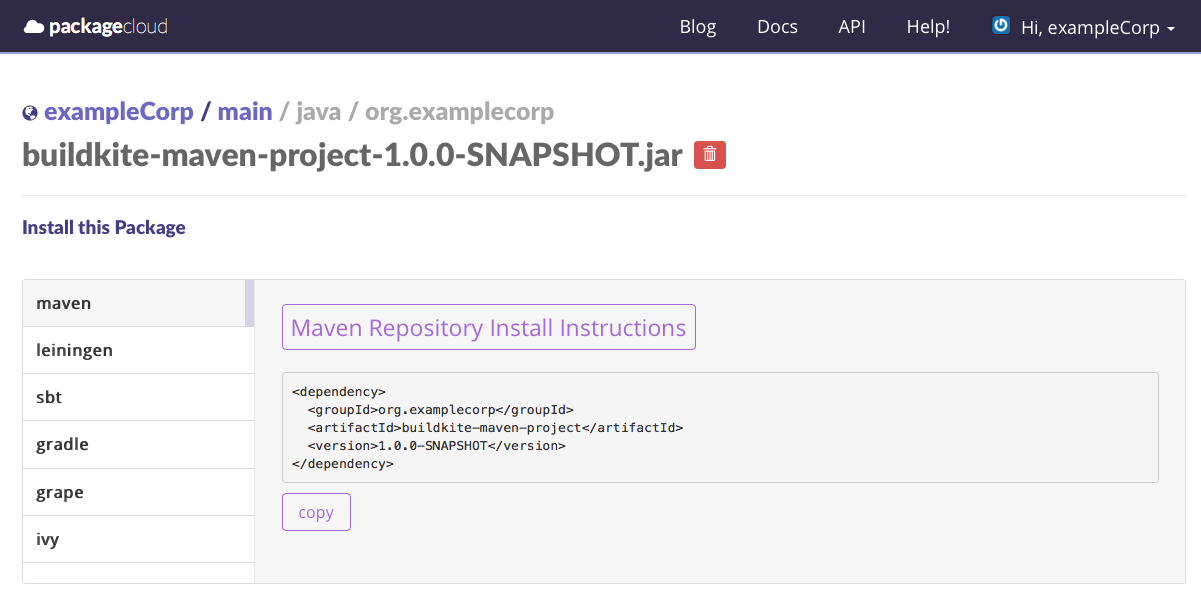 The published artifact and install instructions
Conclusion
With this setup complete your entire team will have an easily deployable set of artifacts for every commit, speeding up the integration cycle between interdependent teams and microservices. You’ll also reduce the risk of a “bad deploy” by having a centralised, automated and repeatable process that’s versioned, and tested, alongside your code.
Head to packagecloud.io and buildkite.com to learn more. And you can find the source code for the example project on GitHub.